(Job Editor)
- Select the [Printer and Media] Tab.
- Click [Change Profiles...] button.
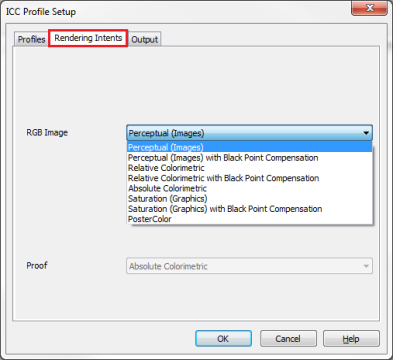
- Select the[Rendering Intents] tab (Figure 1).
- For each drop-down list, select the Rendering Intent you want to use.
NOTE: Depending on the type of data in your image, some options may not be available.
If you are working with a PDF file or a Quick Set , you can choose a [Rendering Intent] for both image and vector data and Lab Images. The [Proof] option is disabled unless a Proof ICC is selected on the [Profiles] tab. Proofing allows you to simulate the Rendering Intent as if you were printing on another printer.
(RIP-Queue)
-
1. Highlight a printer and click “Configure Printer” icon on the toolbar. This opens “Configure Printer” dialog.
-
2. In the [Quick Sets] tab, click [Edit] button. This opens “Edit Quick Set” dialog.
- Click the [ Change Profiles...] button. This opens the "ICC Profile Setup" dialog.
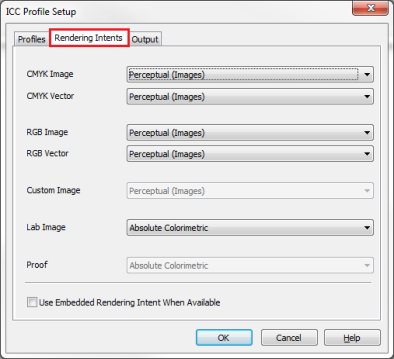
- Click the [Rendering Intents] tab (Figure 2).
- For each drop-down list, select the Rendering Intent you want to use.
Note: Depending on the type of your image data, some options may not be available.
The options on the [Rendering Intents] tab of the "ICC Profile Setup" dialog allow you to select the rendering intent you want to use. If you are working with a PDF file or a Quick Set, you may choose a rendering intent for [Image], [Vector] data and [Lab Images]. The [Proof] option is disabled unless a proof ICC is selected on the Profiles page. Proofing allows you to simulate the rendering intent as if you were printing on another printer. For more information, see Proofing.


 To use the [Rendering Intents] tab: